
For those who love their Android devices but still want to use Microsoft Word, this is the guide for you.
Microsoft Word, part of the Microsoft Office 365 bouquet of products, is available as an easy download for Android phone users. It is not the exclusive joy of the Microsoft phone user, nor is it only available for those who carry a snazzy laptop around with them. No, you can squeeze plenty of value from the app that’s available from the Google Play store and you can add features based on your requirements and budget.
Microsoft Word for Android is found right here. It is stable, reliable and, even though not an Android-specific solution, extremely easy to work with. Below, you will find some crafty tips that will help you get that little bit extra out of Word on your Android device…
Tasty starter tips
So, you’ve downloaded Word and you’ve probably realised that if you really want to tease out every feature it has on offer, you’re going to need a Microsoft Office 365 subscription. It isn’t a crisis if you don’t, you can still access some features for free – and they are pretty good – but you won’t have the full range which include collaboration, reviewing and tracking changes, among others.
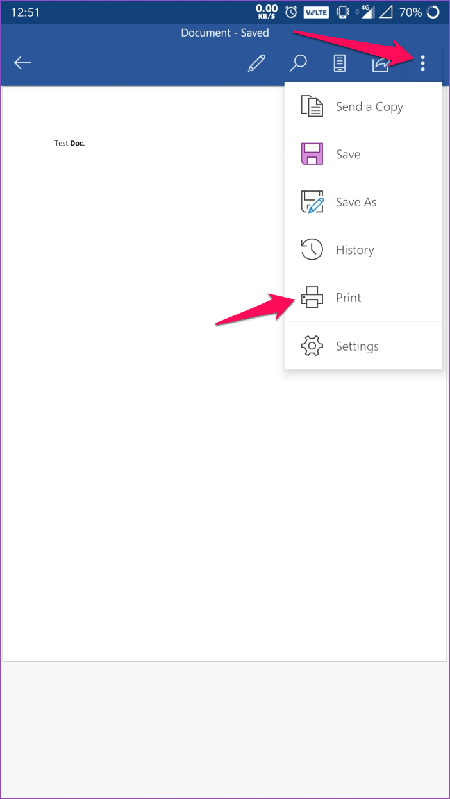
You will also have noticed that working with Word for Android isn’t as easy as with a full keyboard, mouse, and desktop PC set-up. It takes some getting used to so play around with the keys and get to know the interface, then let’s step into our first tasty tip – turn your Word document into a PDF. Open up a new Word document, enter in your text or images, then tap on the menu on the top right that is represented by three dots (…). Tap on Print and then select the Save as PDF option. If you happen to have a printer connected to your device, you will need to tap on Print and then on Save as PDF from the menu. Once you’ve tapped on Save as PDF, tap the Save button, name your document, allocate a location and hit Save. That’s it. You’re done. It really was that easy.
Snap it and store it
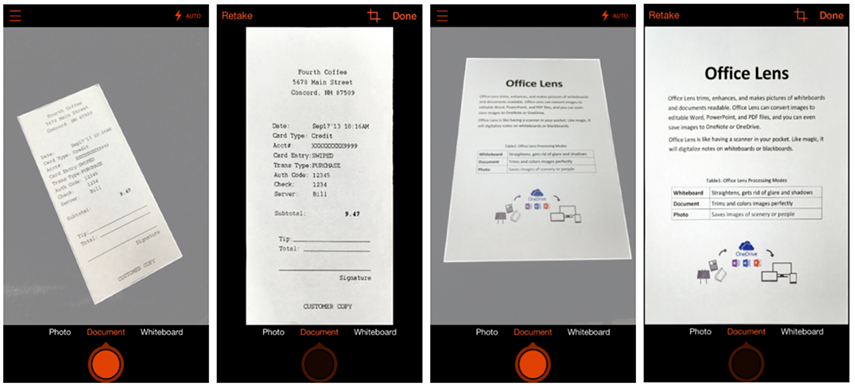
Fancy being able to take a photograph of pretty much anything and save it as either a PDF or a Word document? Well, you can. And it’s easy. Your first step is to download the official Microsoft Office Lens app from Google Play right here. It is completely free with no secret add-on costs whatsoever. Once you’ve installed it, you can use your device camera to take photographs of anything and turn it into a Word document or a PDF or PowerPoint. Microsoft Office 365 users will appreciate the ability to upload these images to OneNote and OneDrive for easy access across all devices.
However, you can do more than just snap and save in the format you like. You can also use this scanner to transmogrify your image into a Word document and then use this to further adapt the image for use at work. For example, you can use word to annotate your documents and edit them. You won’t be able to edit directly into the text of the image, but you can add on notes which you can refer to later. Tap on the T icon on the top right to add text to the page, tap on the A icon to adapt the font, use the traditional crop image icons to shape the photo – remove edges or flip it around – and use the double-circle icon to specific where the image came from – whiteboard, photo, business card or document. The pencil icon allows you to colour-code your text and the save button allows you to determine exactly where the document goes so you can easily locate it again.
This is a very clever combination of Word and Lens to create a tool that’s useful for work and school.
You’re facing the wrong way
The problem with Microsoft Word for Android is that it stops being free when your screen size reaches a certain limit. So, if you’re working off a tablet because your eyes can’t handle working on a tiny screen or your fingers have lost the will to live because they scroll in all directions for text, that may leave you without a productivity tool you can use. However, all is not lost if you happen to have your Android phone beside you. Simply open the app on the device, open your document and tap on the Home button. Then, tap on Editing, then on the Select button and run your eye down the drop-down menu that appears on the right.
Now this is where things get a bit interesting. Tap on the Select All button – yes, you are about to select all your text – and then, only then, go to the Layout tab by tapping on Layout. On the left you should see the Page Setup tab, tap on the Orientation button and then select Landscape. Now, your entire document will turn sideways. It won’t magically make your phone screen bigger, but it will make working with the text significantly easier. You can always reverse the process by tapping on Portrait to return your document to its original layout.
Finally, as an extra tip, if you are plodding through a giant great piece of work and all you want to do is find a single reference point or track the text based on a word, then you can use Smart Lookup. Tap and hold a word to select it – a pop-up menu appears with the Smart Lookup option. Tap on that and wait with patient joy. The software will automatically find all mentions of this word and list them in front of you under two categories – Define and Explore. Define tells you what the word means, which is useful, and Explore gives you the locations of the word in the document. Simply tap on the one you want and off you go!